EDIT VIDEOS ON THE GO
DOWNLOAD iMOVIE FOR WINDOWS
iMovie is one of the easiest video editing tools out there. You open the app and you can easily import your clips, audios, add them to the timeline and start editing. I remember, the first time I used iMovie, it was on my iPhone XR. I had recorded the video of my classmate doing a wallrun, and I used iMovie to edit it and the UI was self explanatory. Honestly, for 6/10 things, you won’t even need a tutorial. And since, it’s free of cost, it becomes one of the most pocket friendly video editing tools to ever exist.
But accessing iMovie on a Windows computer is where the real challenge crops up. Microsoft Windows do not have an iMovie application, because Apple never launched it- as a result, thousands of Windows users looking to use iMovie on their PCs keep scanning their options. But, I have a good news- I have been using iMovie on my Windows computer for around three years now and enjoying the easy editing and seamless sync with iMovie on my iPhone, and today I’ll help you do the same.

iMOVIE WINDOWS FEATURES
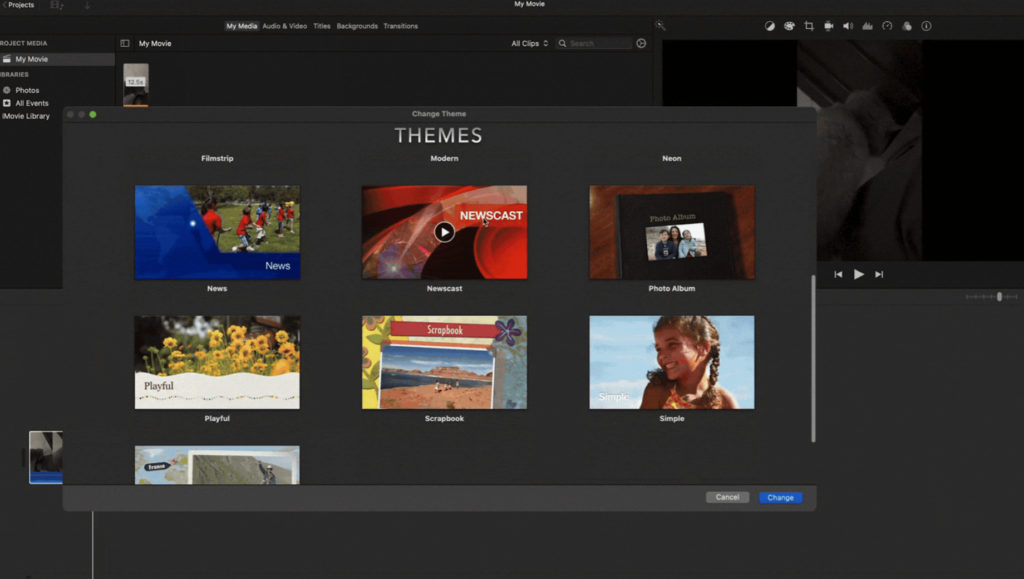
Preset Editing Themes by Apple
iMovie lets you create professional-looking videos with 13 Apple-designed video themes. Whether you are making a short film, a school project, or your first band video, these themes give you preset transitions and text templates to make editing easier.
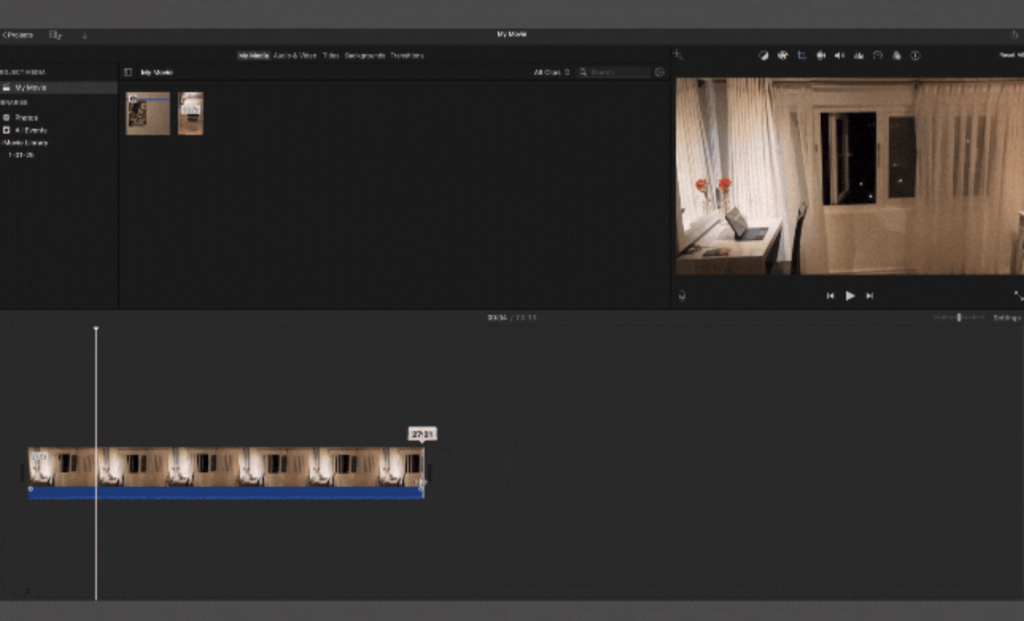
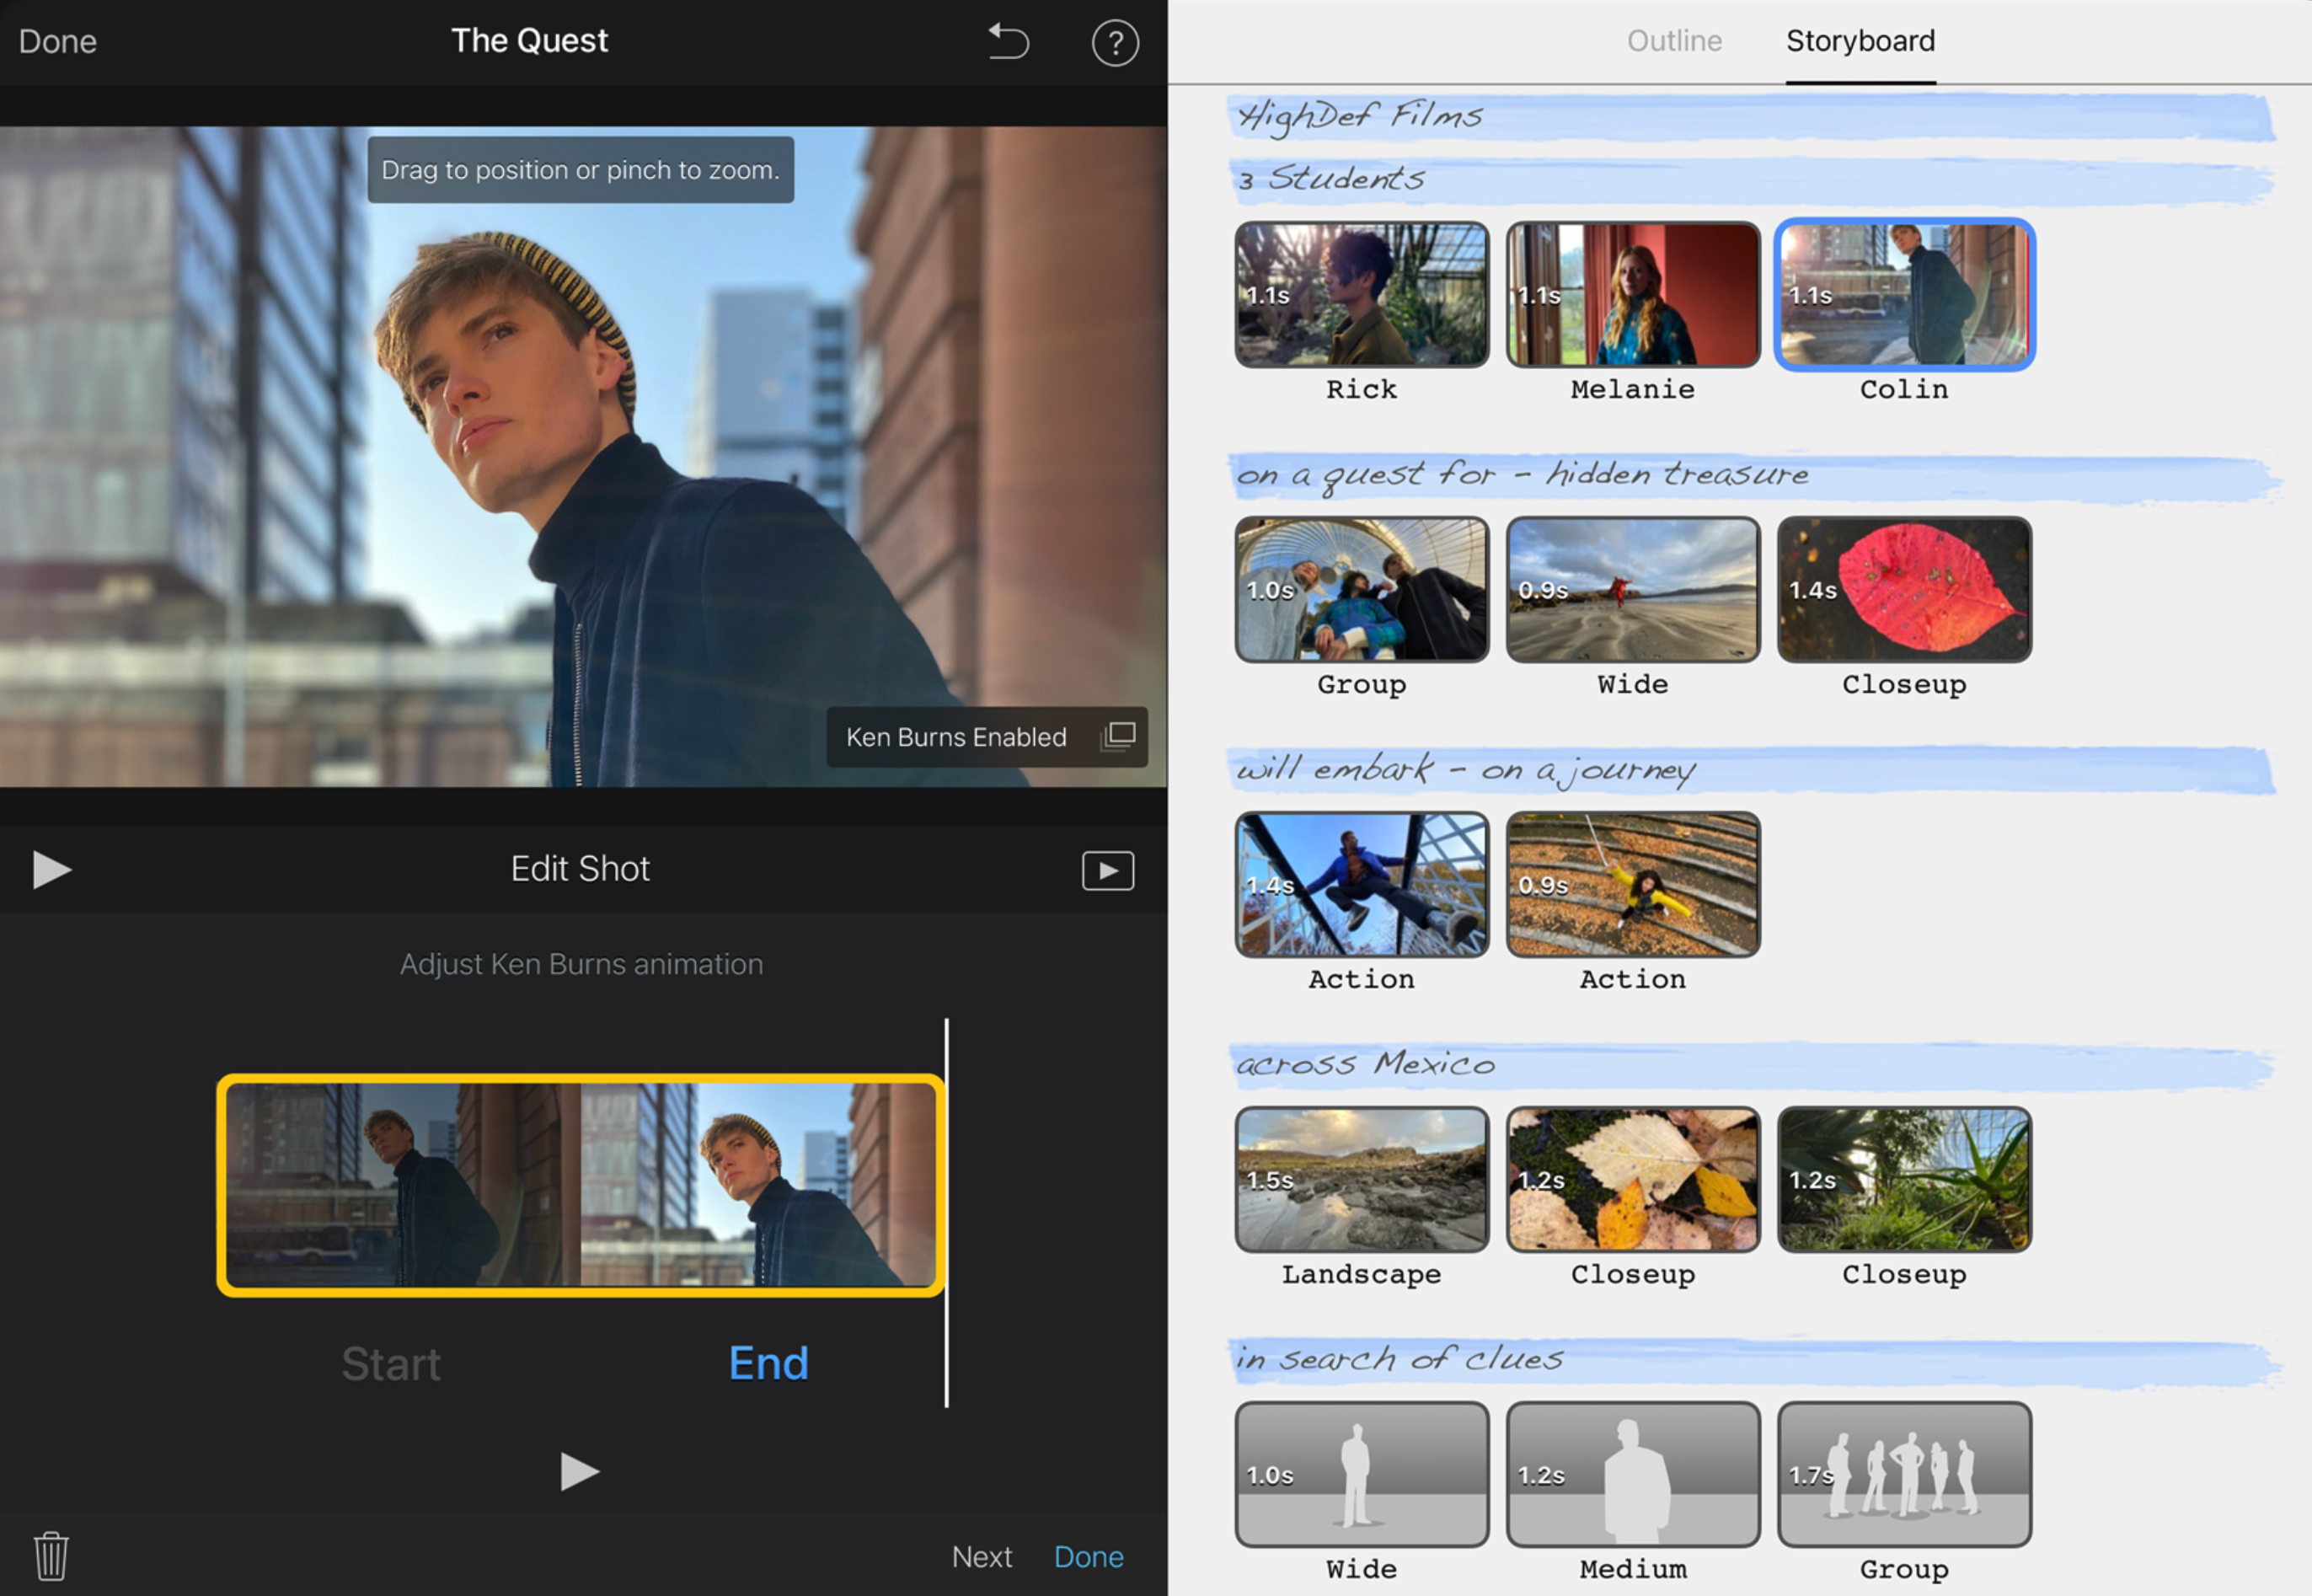
Easily Trim and Join Clips
iMovie’s drag trimmer allows you to trim your clips, pictures, and audio simply by dragging and dropping them to your desired length. You just need to import your media into the app, select the end or start part of the clip, and drag it to trim.
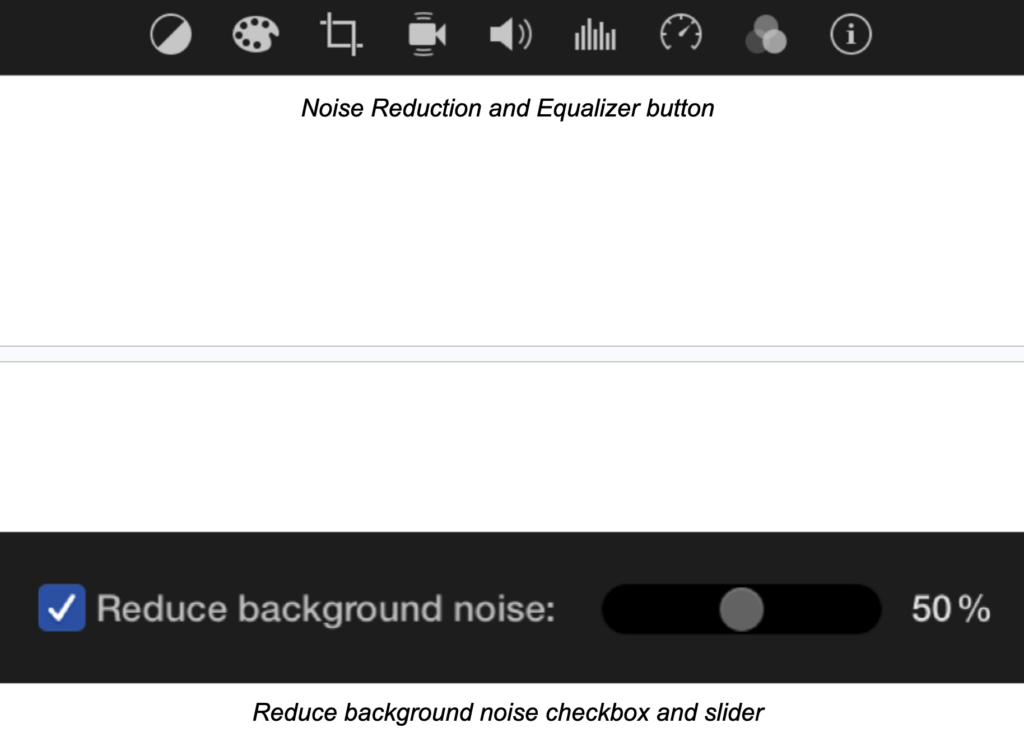
Accurate Noise Reduction
The Noise Reduction and Equalizer tools let you reduce background noise from your clips. You can do this by clicking on the “Noise Reduction and Equalizer” button, clicking on the “Reduce Background Noise” checkbox, and dragging the slider to adjust levels.
Easy Keyboard Shortcuts
The Keyboard shortcuts on iMovie make it supremely easy to use. These hotkeys allow you to perform a wide range of functions such as editing a file, importing files, saving, selecting, or trimming a clip, and more. I mostly use shortcuts CMD + A to select and deselect all files, and CMD + B to trim clips on the timeline.

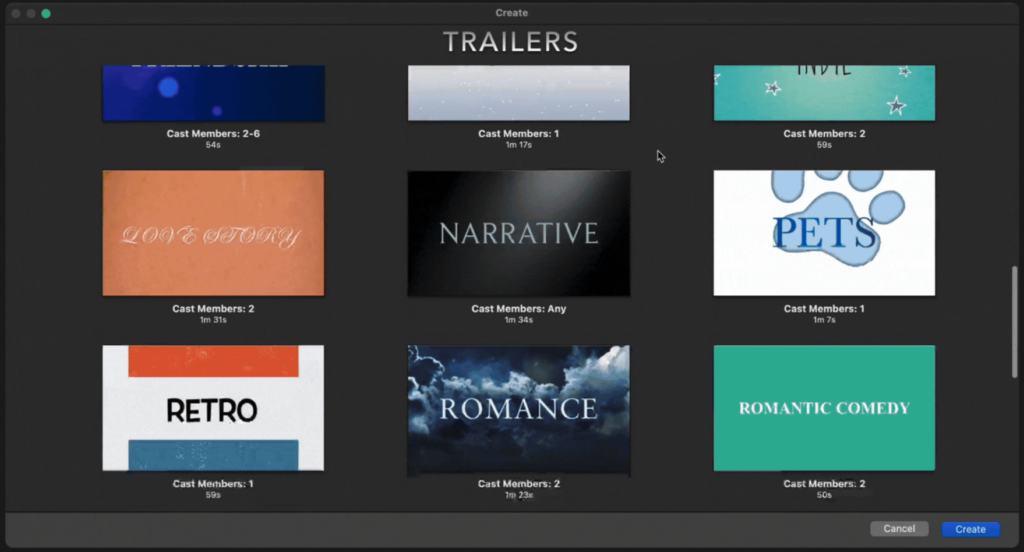
Create Hollywood Style Trailers
iMovie comes with 28 trailer templates that let you create Hollywood style trailers combining your favorite clips and pictures. You can use these trailers as they are, edit them to their taste, or take inspiration for a different project.
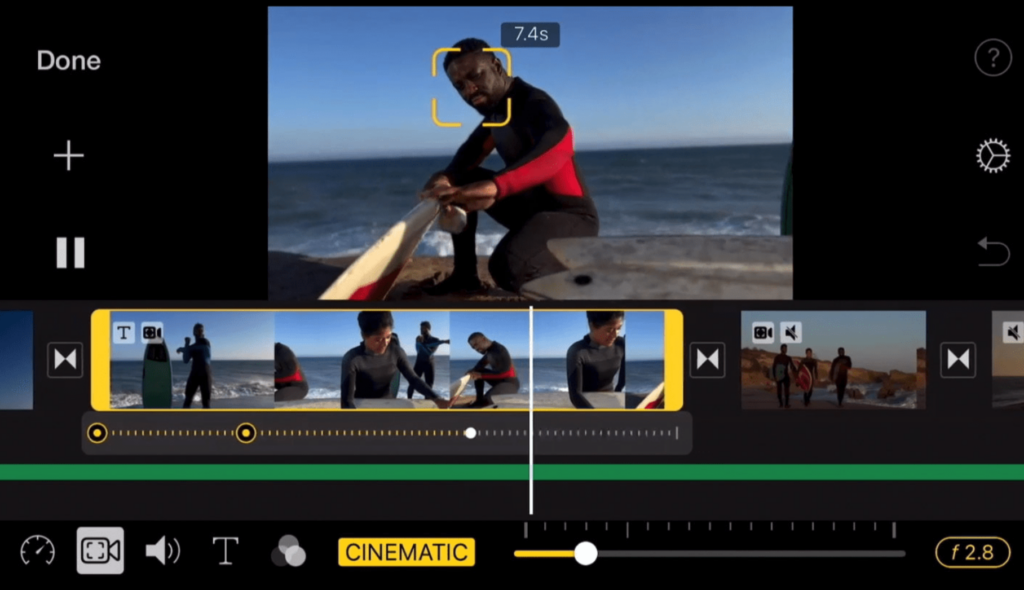
Add or Remove Focus- To and From Any Point
iMovie lets you add and remove focus points and modify the depth-of-field effect in videos and photos you captured earlier. You can also add and adjust cinematic mode videos directly.
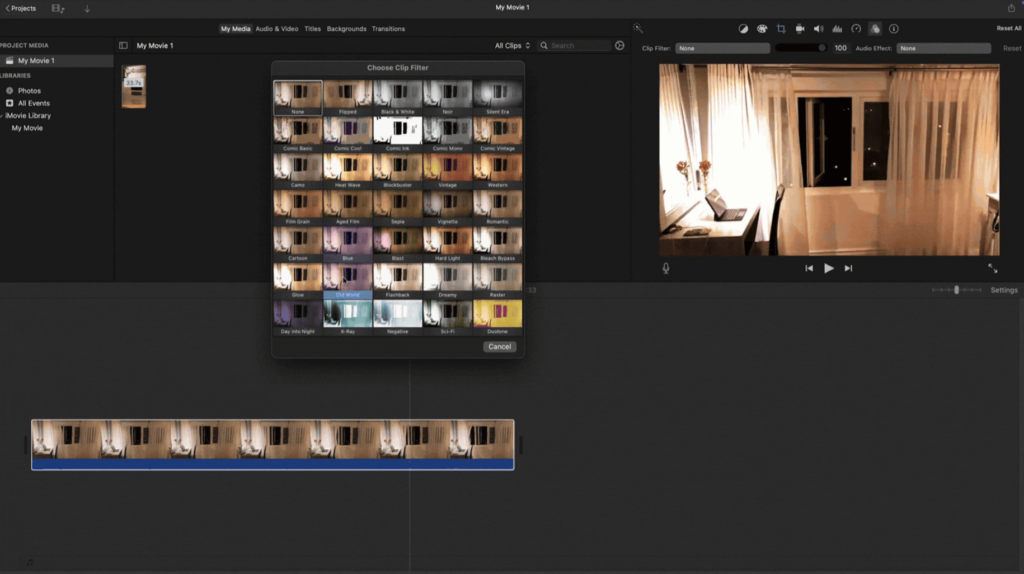
Clip Filters For Every Mood
iMovie comes packed with 35 clip filters that let you personalize your editing projects using your clips and audios. Whether you wish to give your video a sci-fi look or want to make it appear old in a black-and-white print, you can do that with these filters.
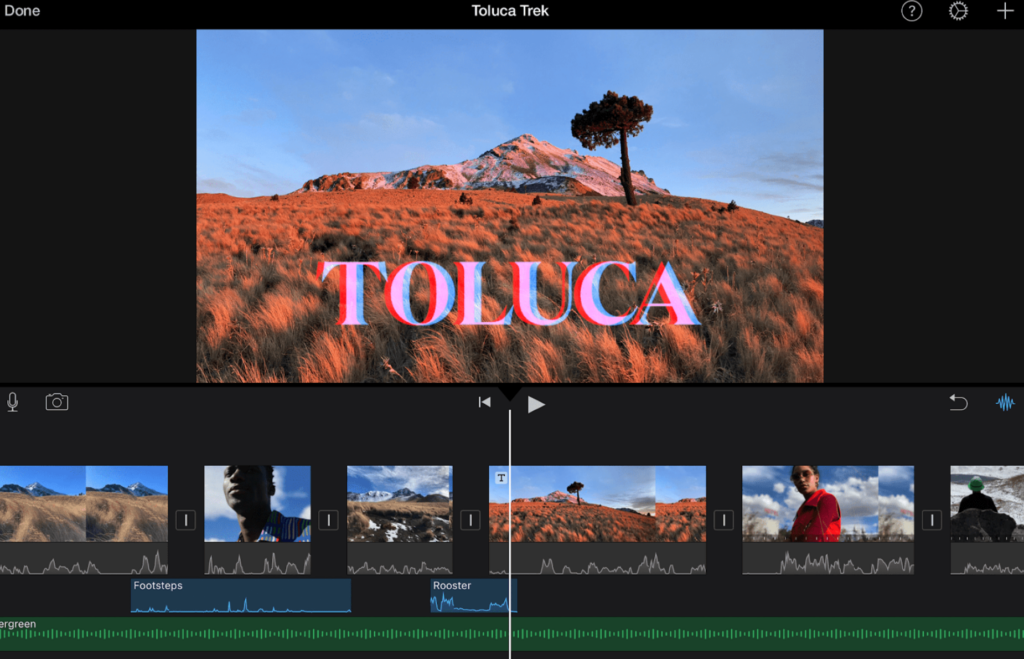
Narrate Your Story Better with Title Cards
Create personalized title cards to narrate your story, move it forward, or give credit. You can choose from a range of fonts and colors to style your text and put it on a background or right inside the video.
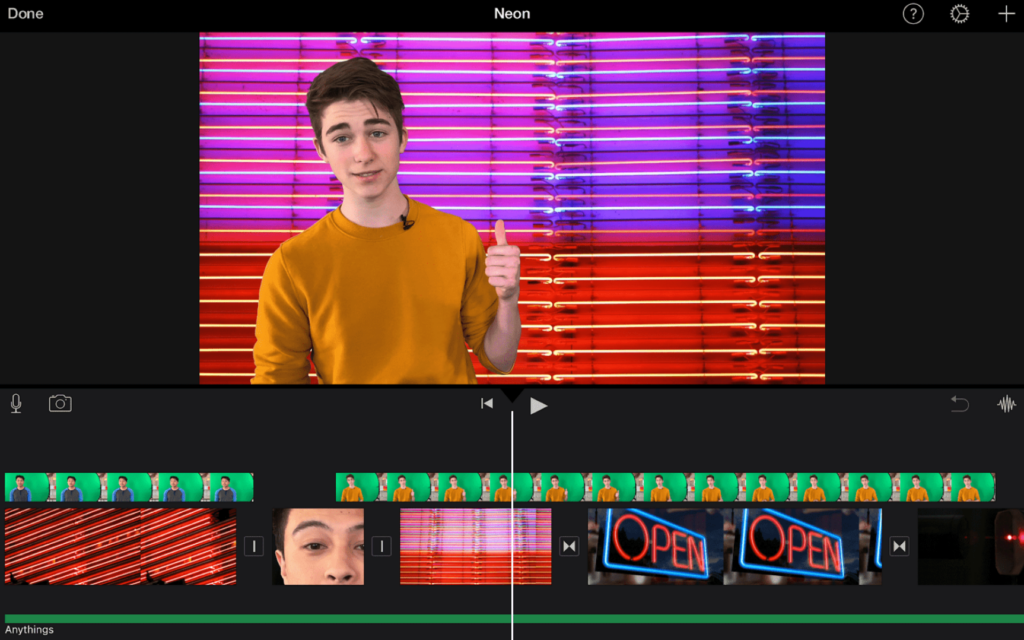
Green Screen to Change Backgrounds
With a green-screen background, you can edit the backgrounds in your videos and change it to whatever you like; or need.
WHAT SETS iMOVIE APART?
While all these features make iMovie a powerful and straightforward editing tool, the following USPs make it even better.
Free of cost; for life
Using iMovie, you can create, edit, and polish most kinds of social media videos. Given its wide range of features and editing capabilities, being “free of cost” makes it one of the best editing tool in its price range.
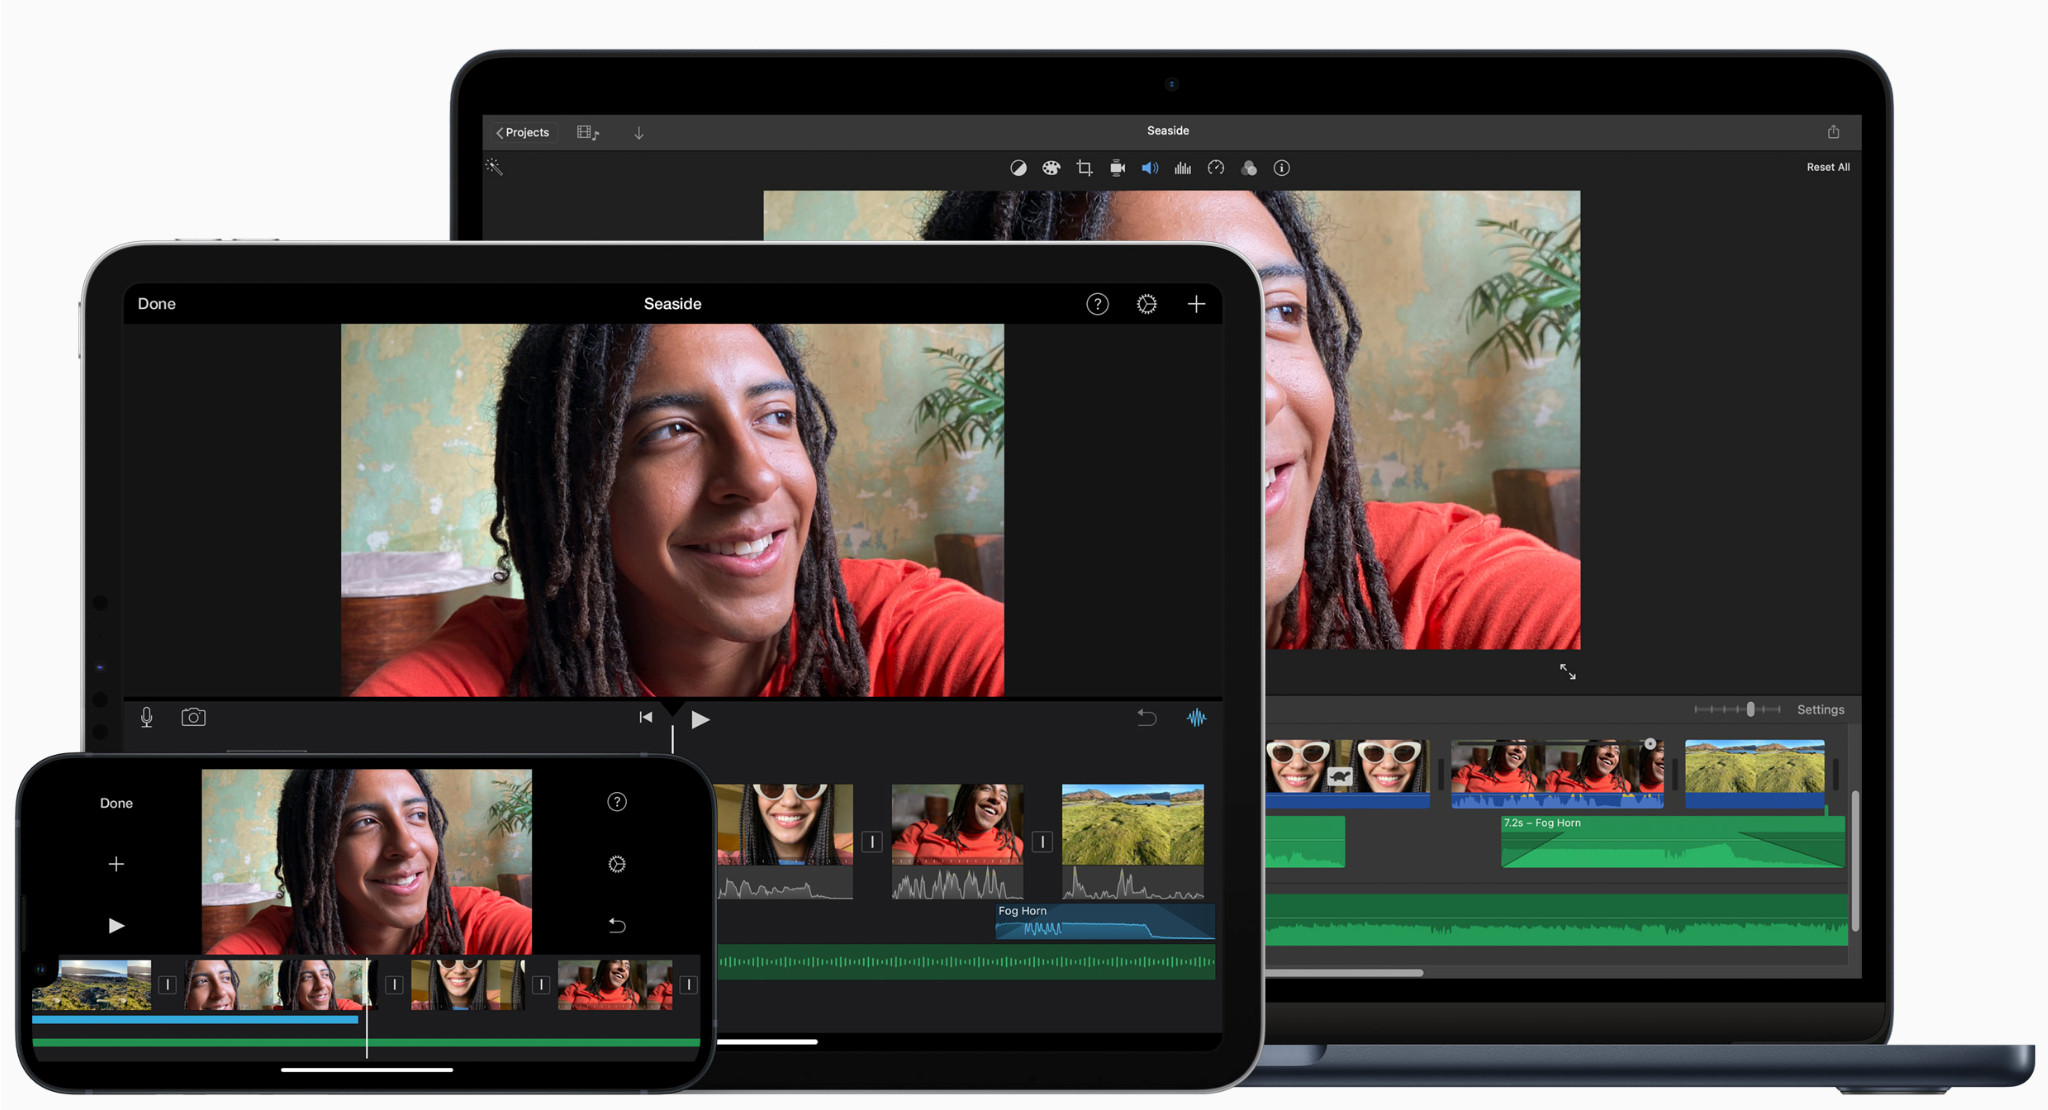
Seamless iCloud Sync
Create, cut, and edit video projects between your iPhone, iPad, and Mac. Whether you’ve shot your video on your iPhone or on a professional camera, iMovie lets you work your editing magic across all devices.
iMOVIE SYSTEM REQUIREMENTS FOR PC
| Component | Requirement |
| Operating system | Windows 10, 11 – 64 Bit |
| Processor | Intel Core i3 3.90 GHZ or better AMD Ryzen 3 or better |
| RAM | 8 GB (12 GB preferred) |
| Free disk space | 10 GB for installation At least 20 GB for 4K editing and storage (Recommended: 100 GB free space) |
| Audio devices | Any standard device can work. |
| Graphics | Intel HD Graphics 5000 or later NVIDIA GeForce GTX 700 or later AMD Radeon R5 or later |
HOW TO INSTALL iMOVIE ON WINDOWS?
You can install iMovie on a Windows computer with the help of a virtualization software such as VirtualBox or Virtual Machine. These virtualization tools create a host environment where we can install other operating systems including macOS. For the current installation, we are using VirtualBox virtualization software to install macOS Big Sur on our Windows 11, Ryzen 3 computer.
Phase 1: macOS Setup
Files and Downloads
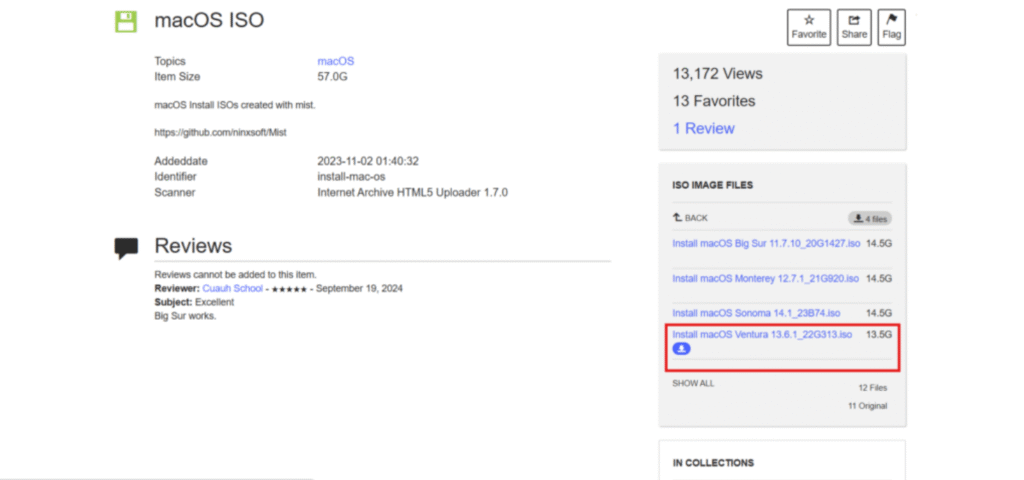
Step 1: Download the macOS ISO- here.
Step 2: Visit the VirtualBox downloads page and click “Windows hosts” to start the download.
Step 3: Launch the VirtualBox Installer and follow on-screen instructions.
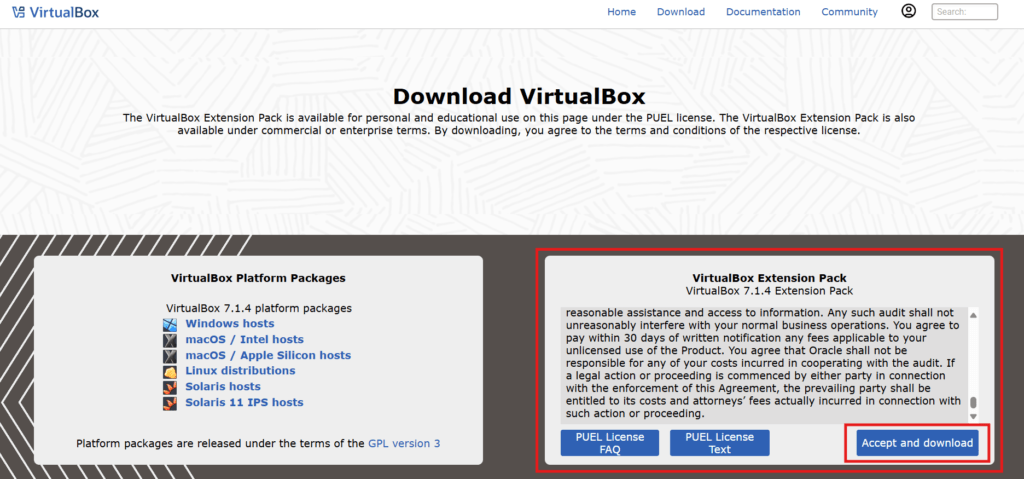
Step 4: Visit the VirtualBox downloads page, go to the VirtualBox Extension Pack box on the right, and click “Accept and Download.”
Step 5: Launch the Extension Pack installer and follow on-screen instructions.
Disable Windows Hyper-V
Hyper-V is Microsoft’s Virtualization software for Windows 10 and 11 that allows users to create and run multiple virtual operating systems on their Windows computer. But, since it is a Microsoft product, it only supports Windows and Windows Server operating systems, along with Linux and Ubuntu. For this reason, we use VirtualBox for our installation, and for VB to function properly, we need to disable Hyper-V.
Step 6: Switch off Memory Integrity
– Type “Windows Security” in the search bar
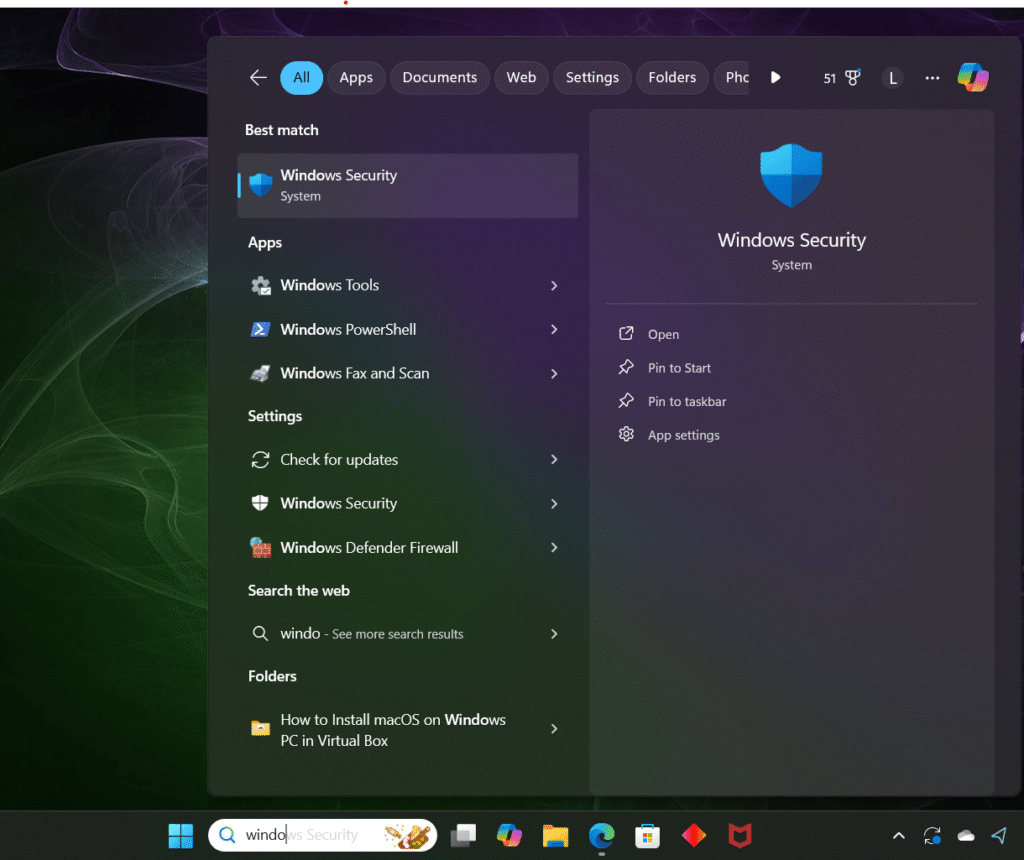
– Open “Windows Security”
– Select “Device security”
– Click on “Core isolation details”
– Toggle off “Memory integrity”
Step 7: Complete the Hyper-V disable process- Right-click on the “Command Prompt” icon and click on “Run as administrator.”
Type this code in Command Prompt and hit enter:
Bcdedit /set hypervisorlaunchtype off
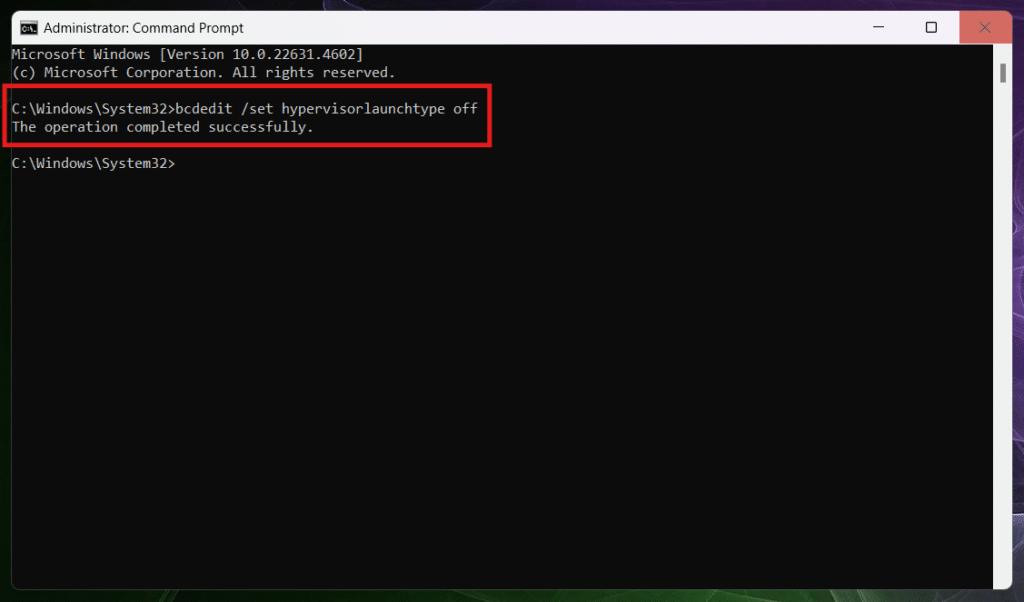
Restart your computer and the disable process will be complete.
macOS setup in VirtualBox
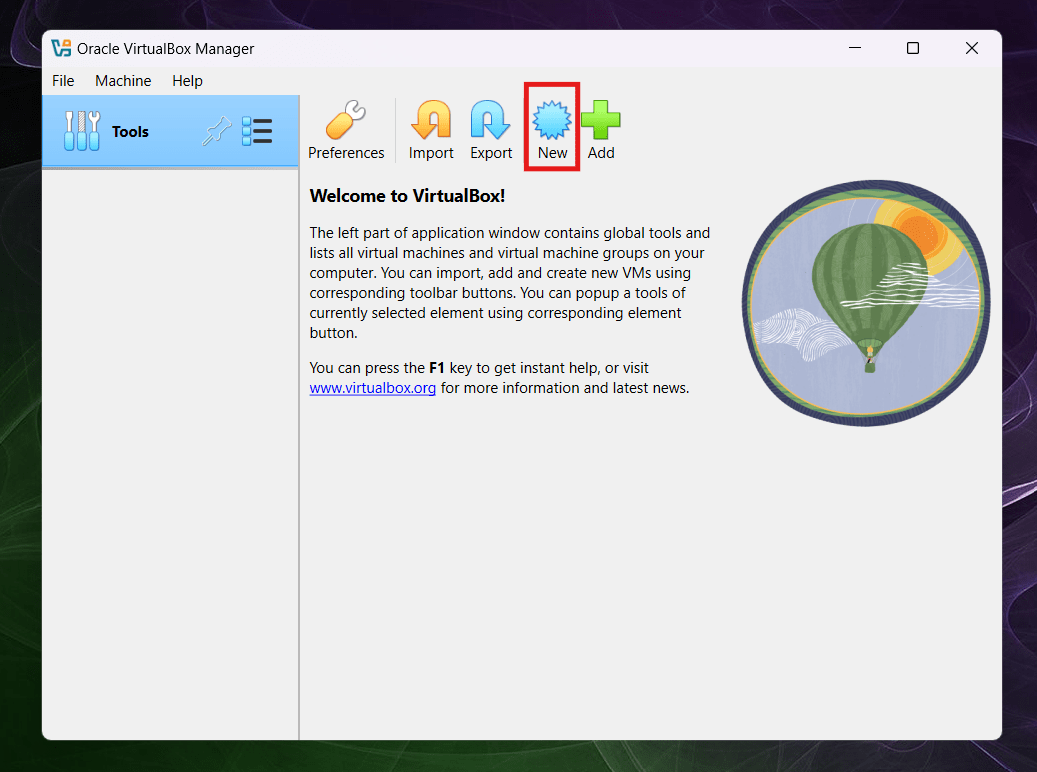
Step 8: New macOS installation in VirtualBox
– Click on the “New” button
– Open Oracle VirtualBox
– Enter the name for this installation, pick your ISO image file, select Version as Mac OS X (64-bit), and click “Next.”
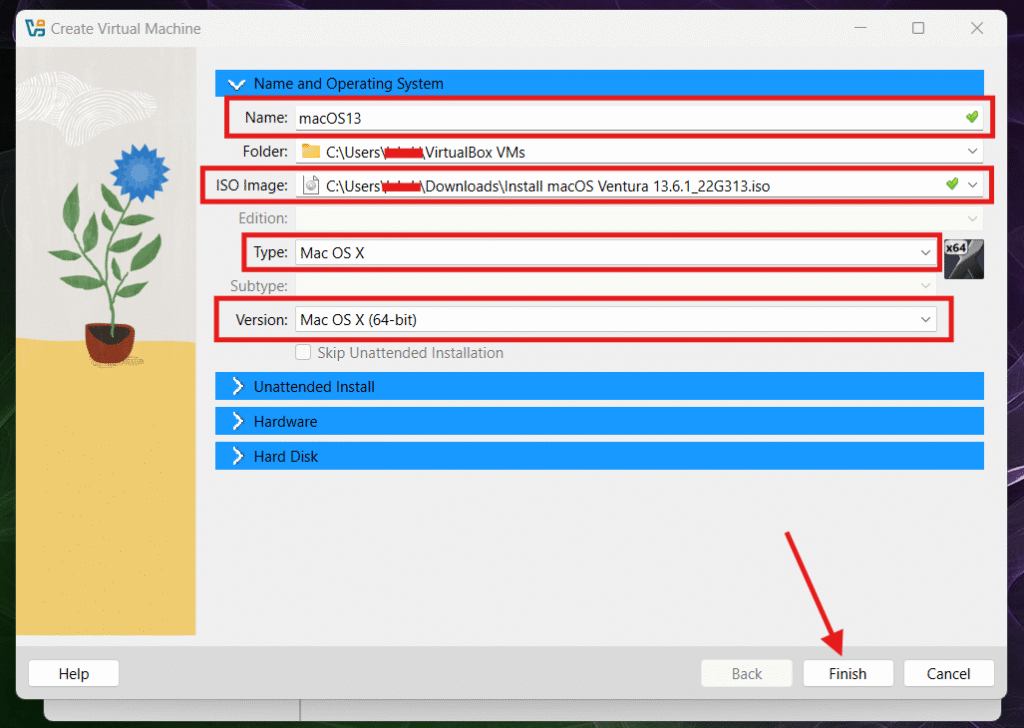
– After this step, allocate the storage space for your VM macOS (recommendable- at least 80 GB).
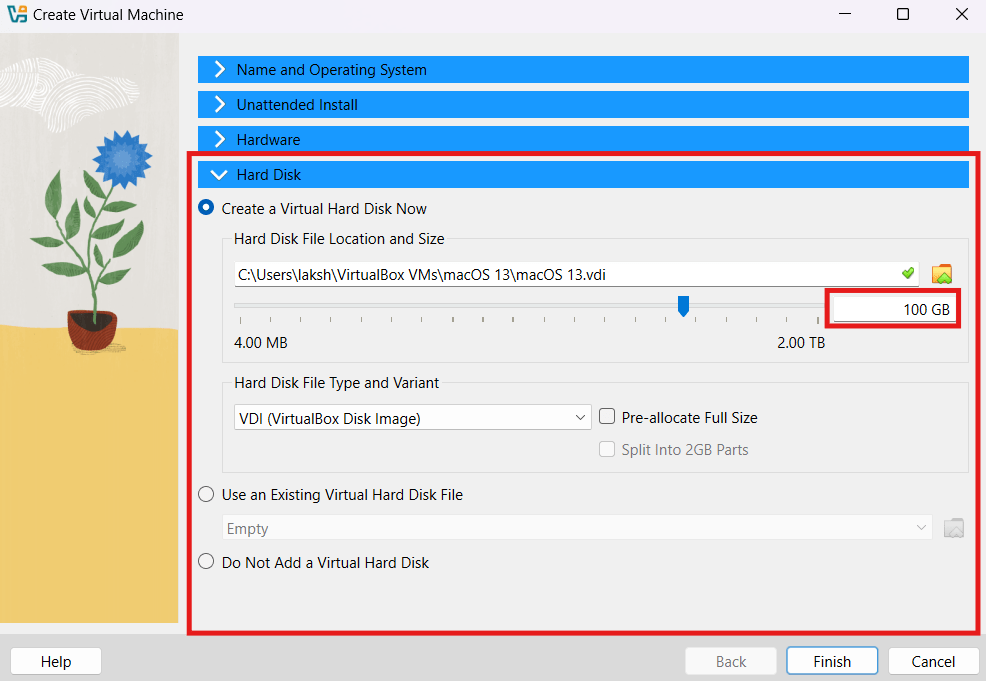
– Click “Finish.”
Audio, Display, WiFi Settings for macOS
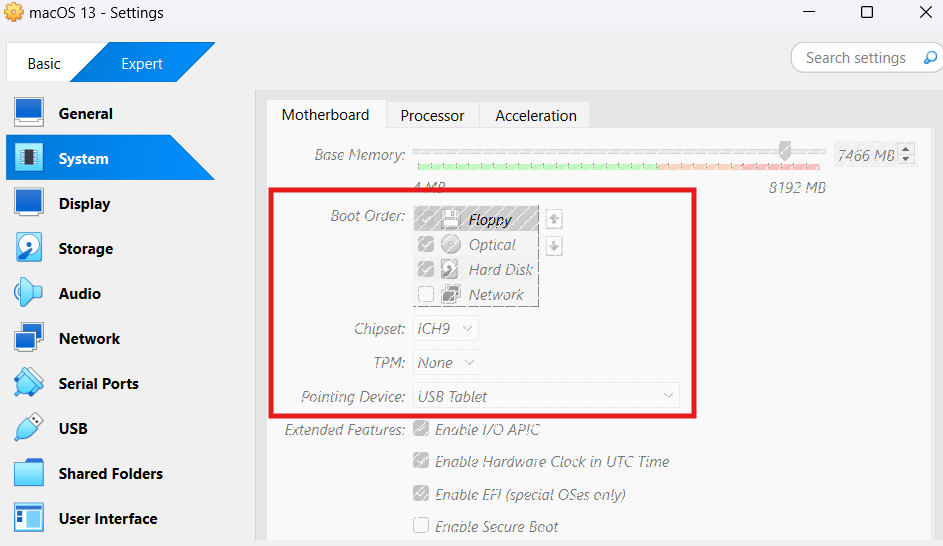
Step 9: Audio, Display, Wifi settings
– In the Oracle VirtualBox window, click on the “Settings” icon.
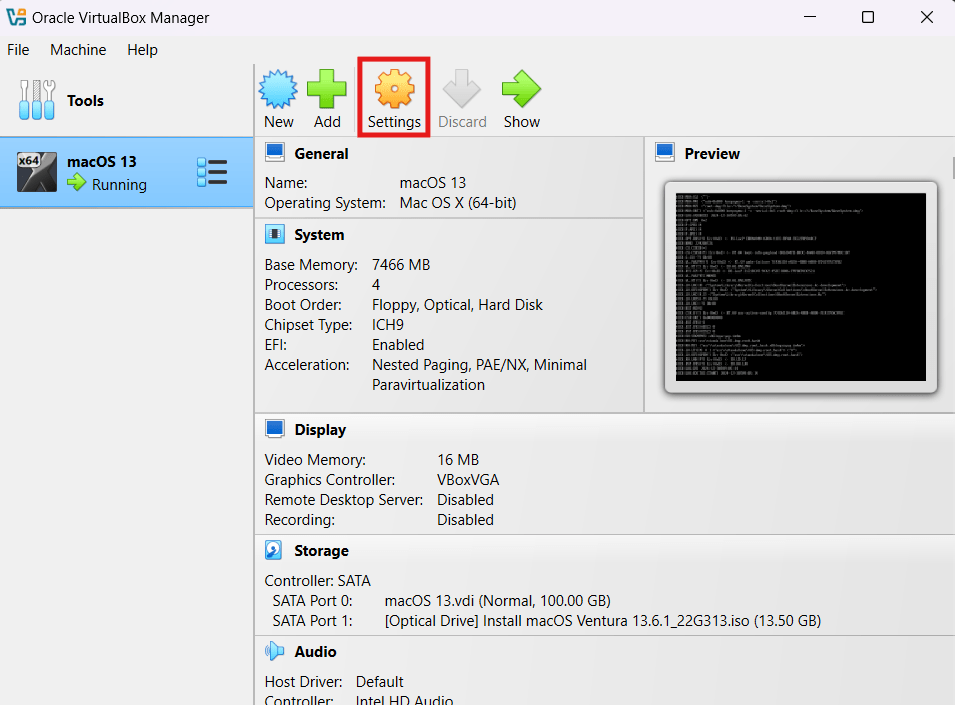
– Open the “System” tab
– Set the Chipset to ICH9 and enable EFI check- this will ensure faster boot times
– Go to Display settings, set Video Memory to 128 MB, and Enable 3D Acceleration
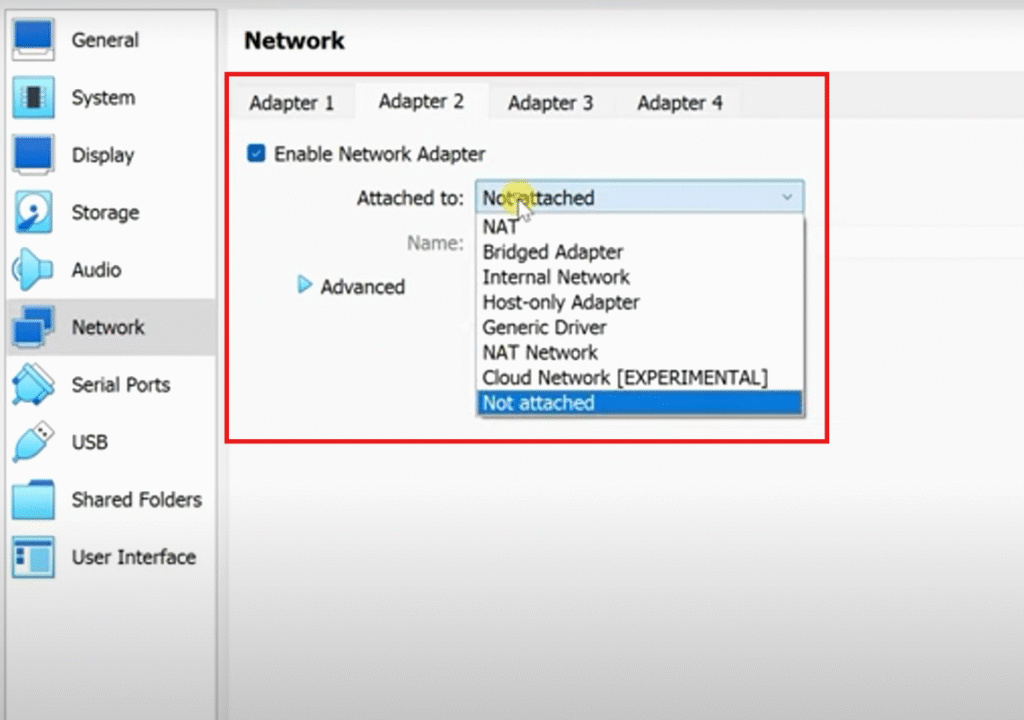
– Now, go to the “Network” tab > “Adapter 2” > “Enable Network Adapter” and select your adapter from the “Attached to” menu.
Patch your macOS
While patching can mean different things in computers, in this case, it is the process for establishing a secure connection between the virtualization software and your macOS installation, while also eliminating any security vulnerabilities, bugs, and errors. The right patching codes can ensure a smoother operation of your virtual operating system.
To patch your macOS, you can find codes from the Internet Archives website. It is recommendable to get these codes from a reliable source, since, they make changes to your computer.
After finding the codes, you can-
Go to the search bar > search Command Prompt > right click and “Run as an Administrator” > paste these codes and hit enter.
Finishing installation
Step 11: Install macOS into the Virtual Machine
– Click “Start” to start your VM macOS
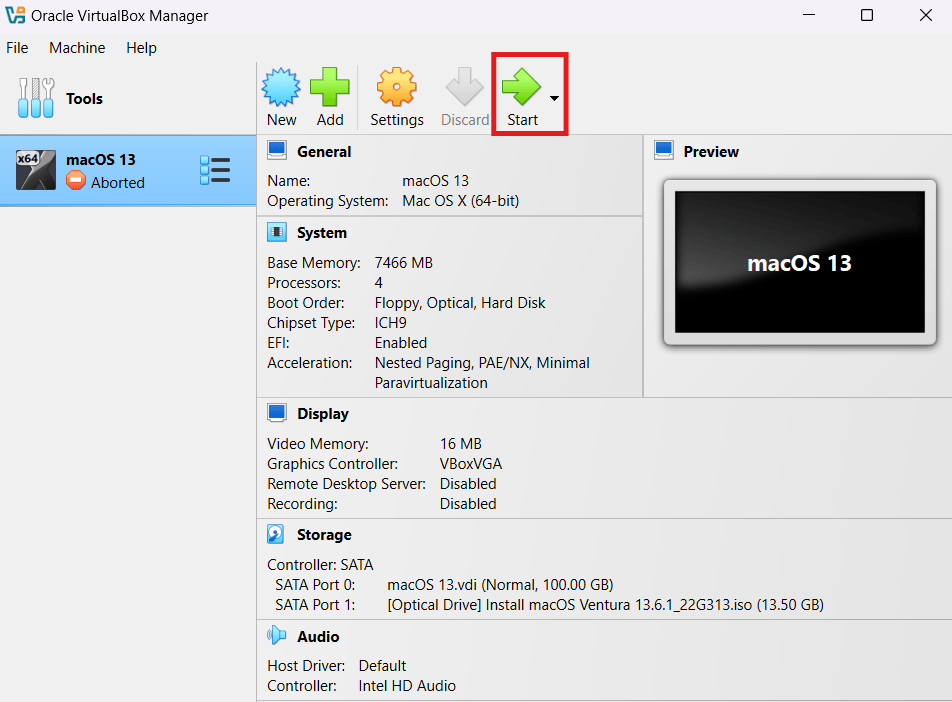
A script will start running. Let it end.
Step 12: Format the Virtual Drive
– After the previous steps, macOS will start booting and the Apple logo will appear.
– Select your preferred language and click on “Disk Utility.”
– Select VBOX HARDDISK Media and click on the erase button in the top bar
– Now rename the drive and Erase it
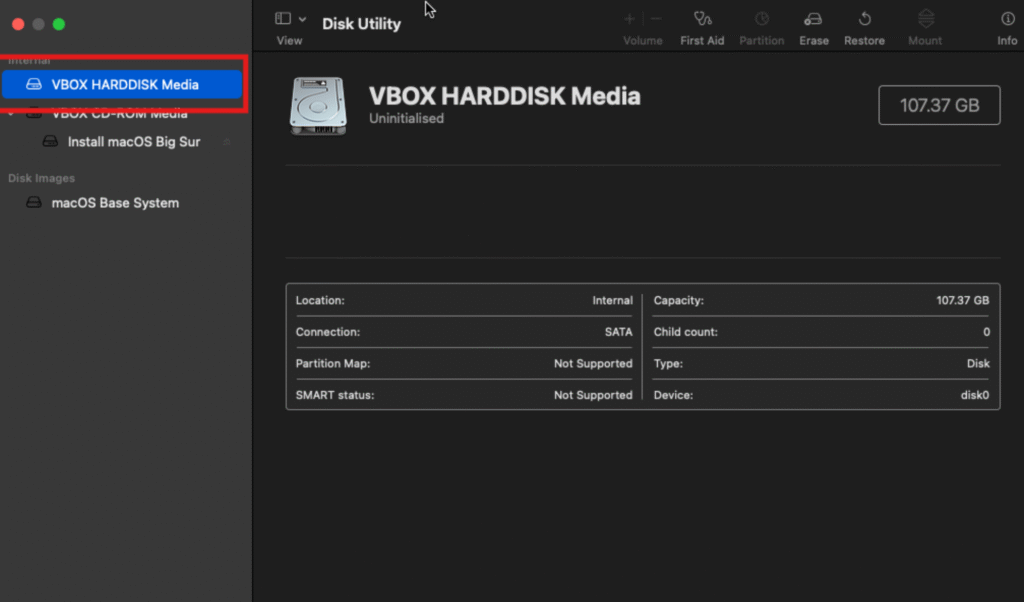
– Close Disk Utility, and click on “Install” macOS
– Follow the on-screen instructions
– Select the newly created disk and click “Continue”
The installation process can take 30 to 50 minutes to complete- depending on your system and processor.
After the installation, your macOS will start. From here you can set up your VM macOS and log in using your existing Apple ID or create a new one.
Phase 2: Using iMovie on PC
Once the macOS setup is complete, you can login to your iCloud ID, go to the App Store, and find iMovie to download. After this, you will be able to use iMovie on your Windows computer.
iMOVIE ALTERNATIVES
DaVinci Resolve
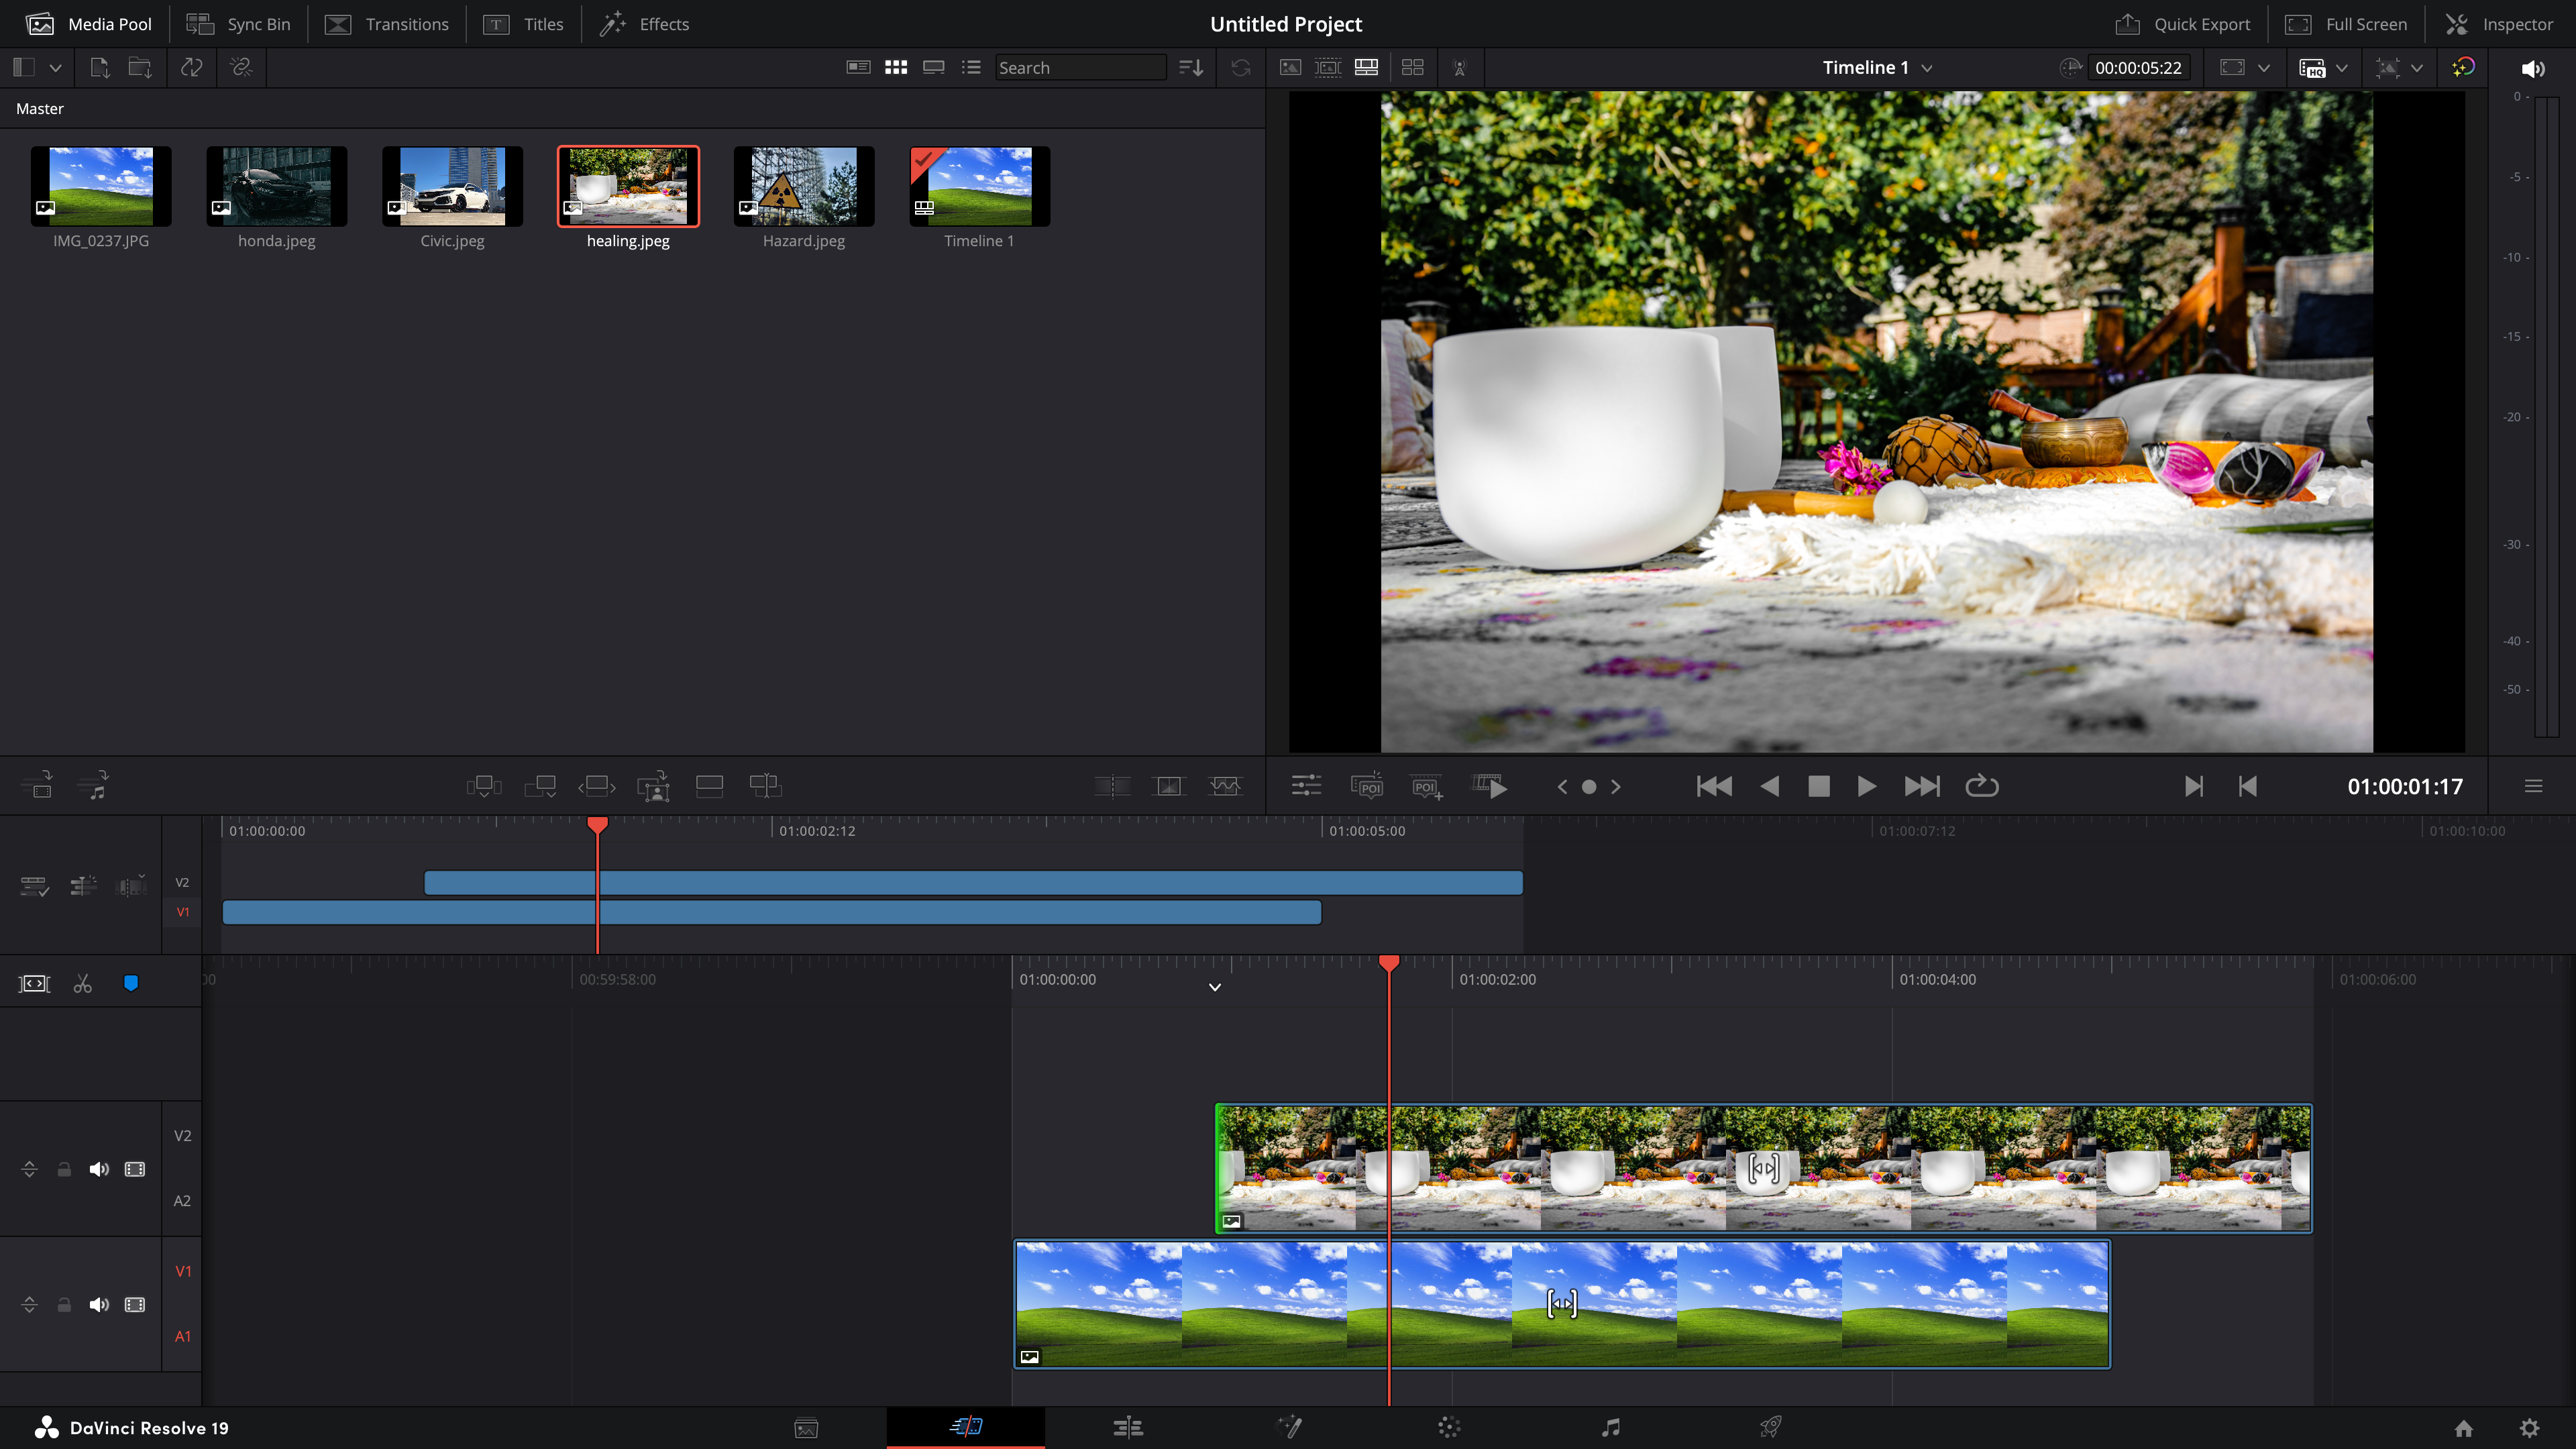
DaVinci Resolve is popular for being the Hollywood favorite video editor- the brand proudly endorses itself as “Hollywood’s #1 Post Solution.” DaVinci Resolve is popularly known for its brilliant color grading and color correction features. Using DVR, you can dive deep into different color layers in any media. This lets you achieve precise level of customizations while doing color correction and grading in your project. Plus, the audio editing interface on DVR is advanced and allows you to edit audios to the precision of an independent DAW. Verdict- if you are a Windows user and are looking for a tool that precisely lets you edit video projects, DVR can be a great tool. However, if you are willing to use a Virtual machine macOS and need to do basic video editing for social media content, iMovie will do the job for you.
Capcut
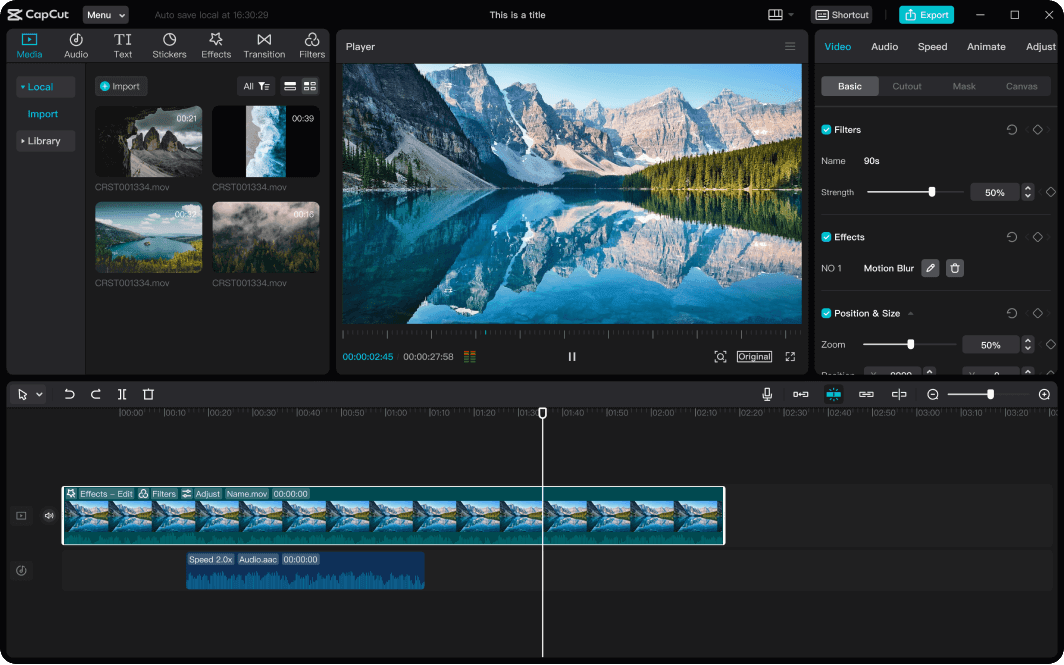
Capcut is another great alternative to iMovie, especially, for Windows users. Some of its features overlap with the former, and a few outperform it. For example, both these apps come with basic editing tools, however, Capcut also allows multiple overlays, while iMovie supports only two overlays on a clip. Similarly, while iMovie has better color editing controls, Capcut is compatible with LUTs which take color adjustments a notch higher. I recently edited a project using Capcut and its color correction flexibility allowed me to edit colors layer-by-layer, which suggests that Capcut leads with precision, while iMovie is more about speed and ease of access.
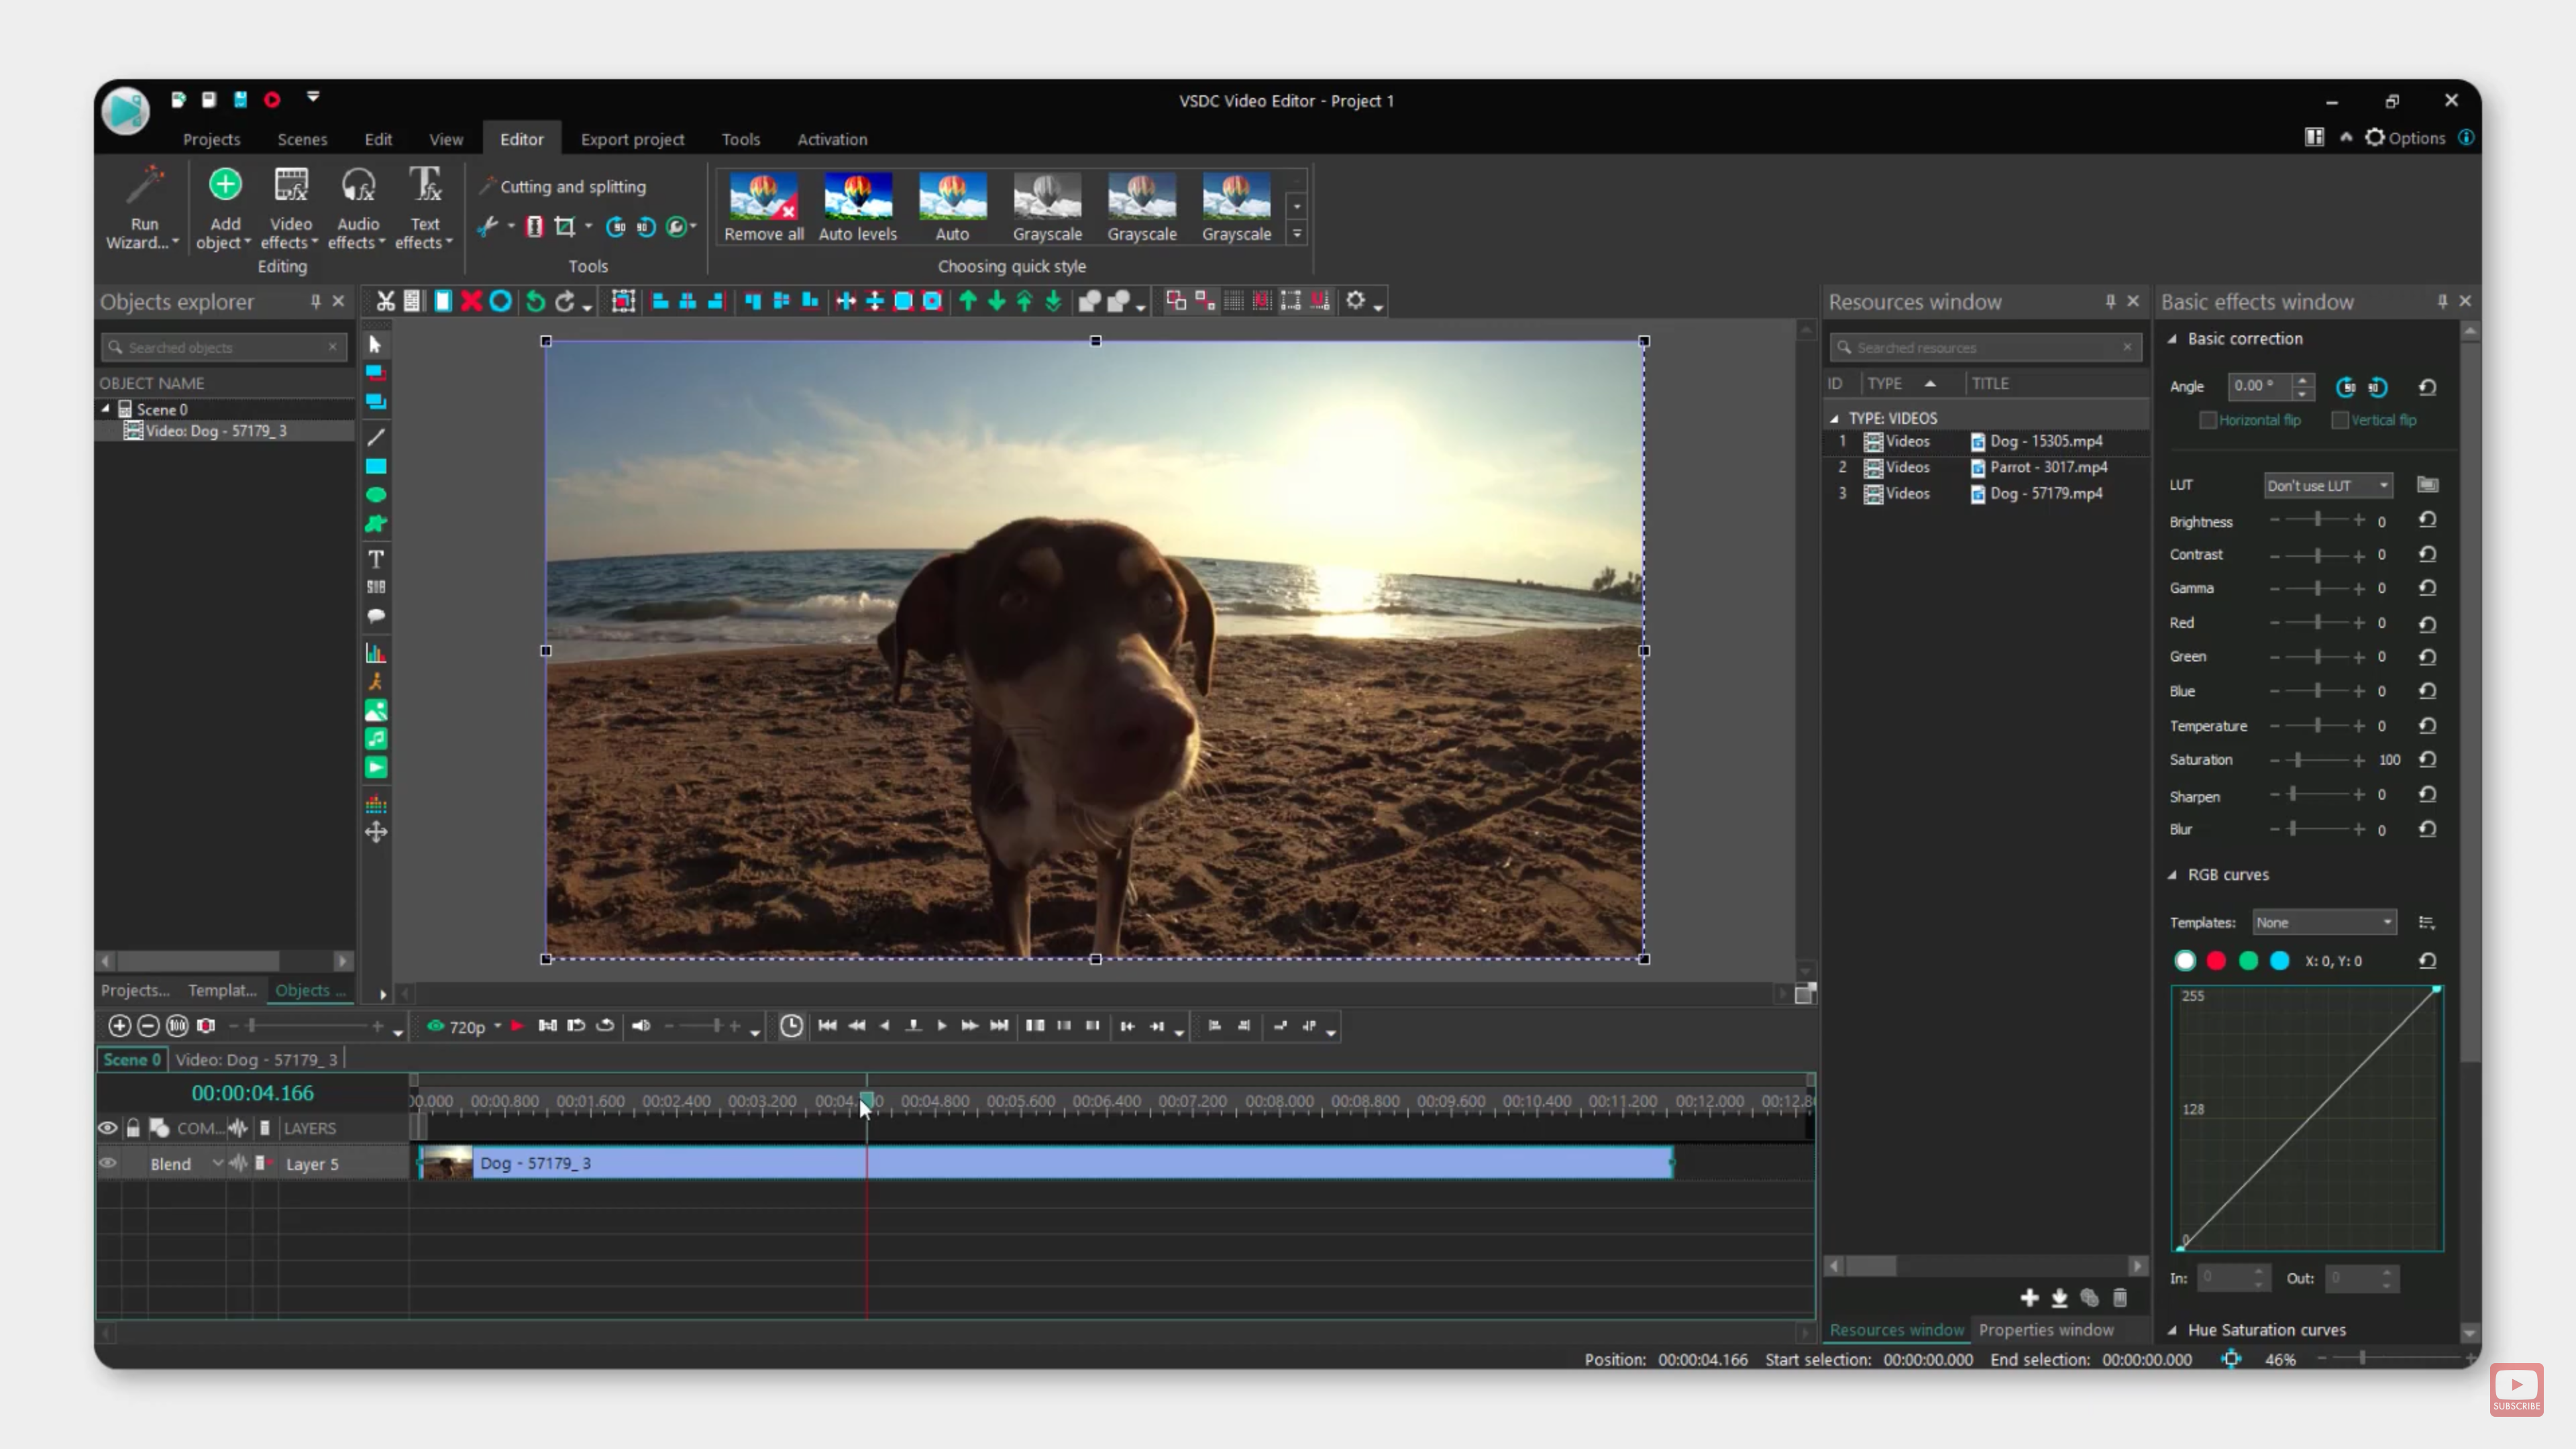
VSDC
VSDC is a free video editor that comes with all the basic editing tools you may need as a beginner editor. The app is available on 32 and 64-bit Windows computers and Mac systems. For Windows computers, VSDC is a godsend video editor. It’s easy to start and easy to use. For example, I opened VSDC, clicked on the import icon, and my browser folder opened. Now, I selected the clip I wanted to import and the tool itself picked its accurate resolution, aspect ratio, FPS, and other specifications that other tools often ask to customize.
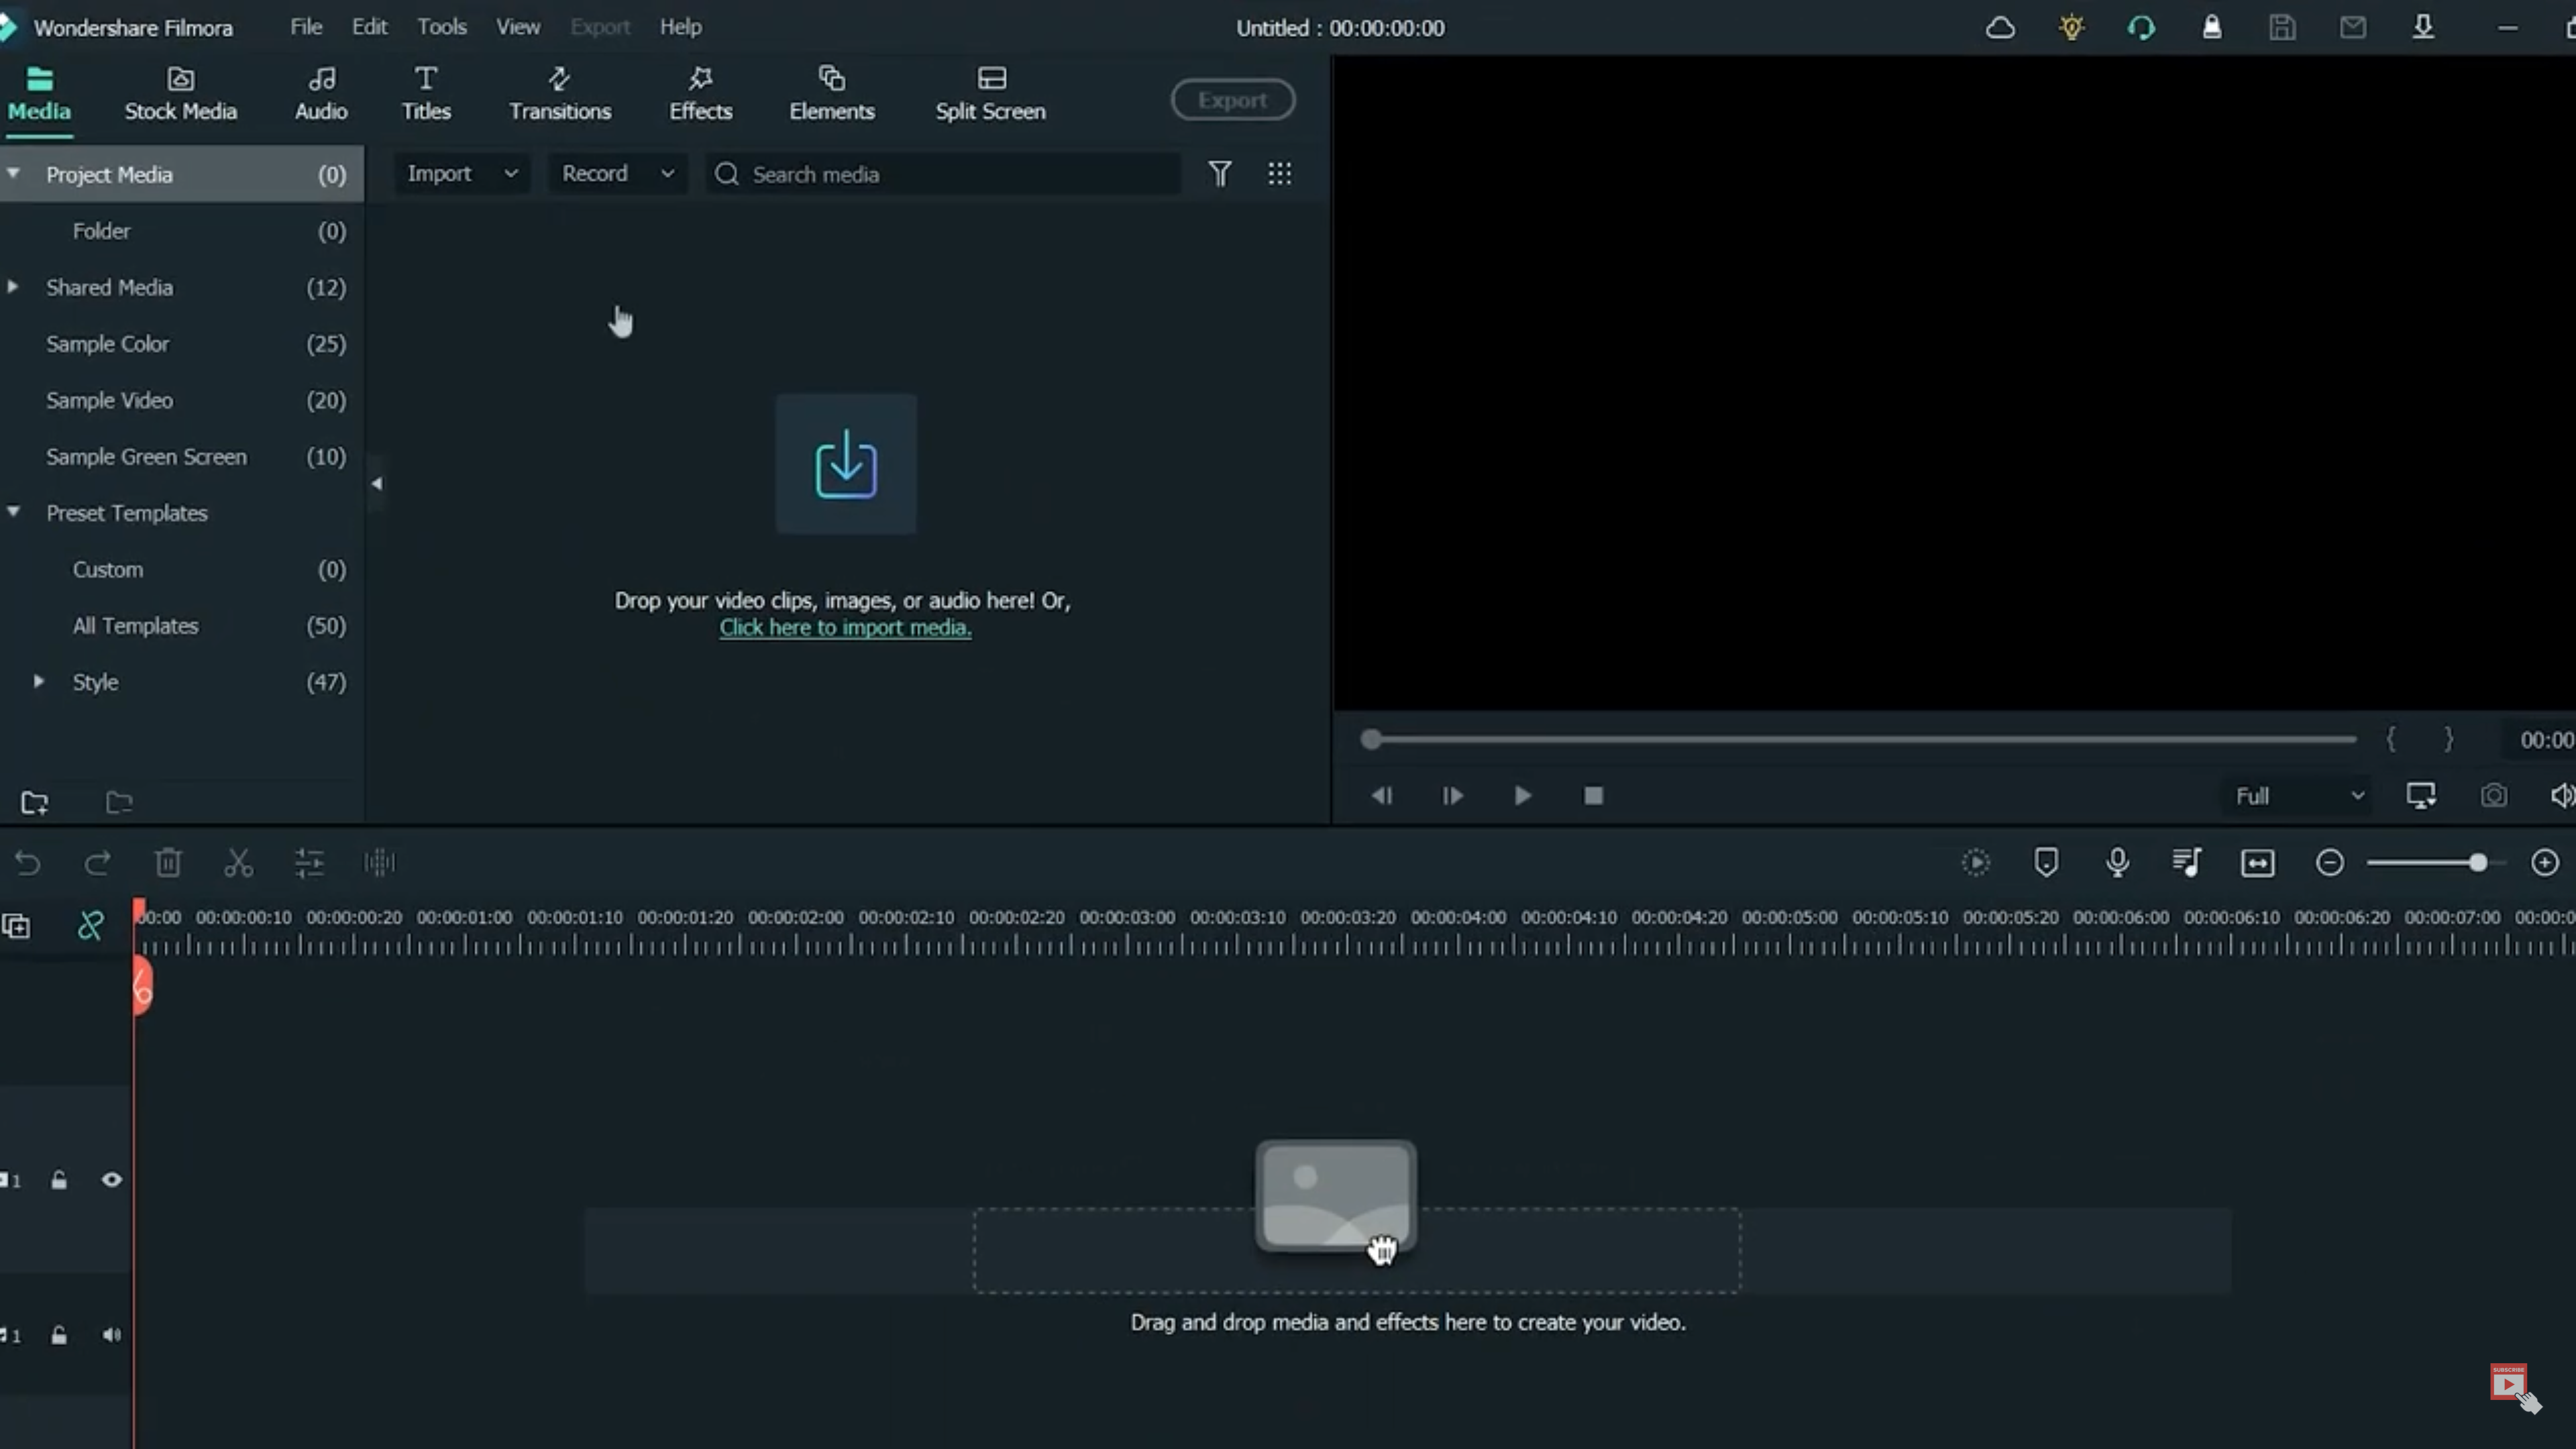
Wondershare Filmora
Filmora is one of the most complete video editing software out there. Its vast library of preset themes, transitions, and plugin support make it a great choice for creating high-quality social media content at ease. I remember using Filmora for the first time- I was in my second year of graduation and had taken up a freelance editing project- that was when my photographer friend advised me to use Wondershare Filmora. I downloaded it on my Windows laptop and the moment I opened it, I felt like I knew what my next steps had to be. The UI is so intuitive, you don’t feel it’s anything new, but get to use tons of simplified features that help you optimize your project. From importing to color grading and audio editing, it performs all the functions with ease. However, its free trial lasts only for 30 days and after that you must decide whether or not you wish to pay for the premium version.
FREQUENTLY ASKED QUESTIONS
iMovie is an Apple-only application, but, you can use one of the following methods for running it on your Windows PC:
– VirtualBox: VirtualBox is a virtualization software by the parent company Oracle, that allows you to create an environment inside your Windows computer for hosting and running other operating systems, including the macOS of your choice. After installing macOS on your computer with VirtualBox, you can easily access all the macOS applications including iMovie.
– VMWare: VMWare is another virtualization tool that allows Windows and Mac users to install different operating systems on their computers. Using VMWare, you can install macOS on your Windows PC and start using iMovie.
– Cloud Mac: If installing a virtaulization software and setting up macOS on it sounds like a lot, you can use a Cloud Mac service which lets you rent a virtual Mac and use it inside your Windows computer. This service operates without using your computer’s excessive resources as the Mac you will get access to is going to be hosted on the service provider’s data centre. For example, if you rent an M4 Mac from MacInCloud at $20/month, you will get access to this Mac and you will be able to use it inside your Windows computer.
iMovie is a free-of-cost video editing software by Apple. You can use it on Windows by installing macOS in a virtual machine, or using a Cloud Mac, or you can download it from the App store on a Mac computer.
There’s a pool of video editing apps for Windows. However, these are the best video editing apps for a Windows PC:
– Wondershare Filmora: I love this straightforward app with an intuitive user interface. The first time I used it was in 2016, and I could finish editing my first project video, without watching even a single tutorial. If you want to get a simple yet powerful video editor on Windows, Wondershare Filmora is a good choice.
– Capcut: Capcut is another easy to use tool that has recently been powered up with AI integration for automatic captions and background removal from media. I personally love its sound library for its special effects including the laughs, typewriting, applause, walking, rain, and thunderbolt audios. So often I use Capcut solely to add the rain and thunderbolt sound effect to make the background music sound heavier and give it a Lo-fi touch.
– DaVinci Resolve: This is said to be Hollywood’s Number 1 favorite post production editing tool and undoubtedly, it is amazing. DaVinci Resolve is most popularly known and appreciated for its post production audio editing tools, video effects, and color correction & color grading tools. I once edited one YouTube video for a friend on his Surface Pro using DaVinci Resolve. The results were brilliant- I specially loved the audio quality in the final video. The flexibility DaVinci Resolve gave me for editing the audio levels, adjusting the equalizer settings, adding audio FX, and paning the audio, while also being able to add fade effects totally surprised me- it almost felt like I was working on a full-fledged DAW.